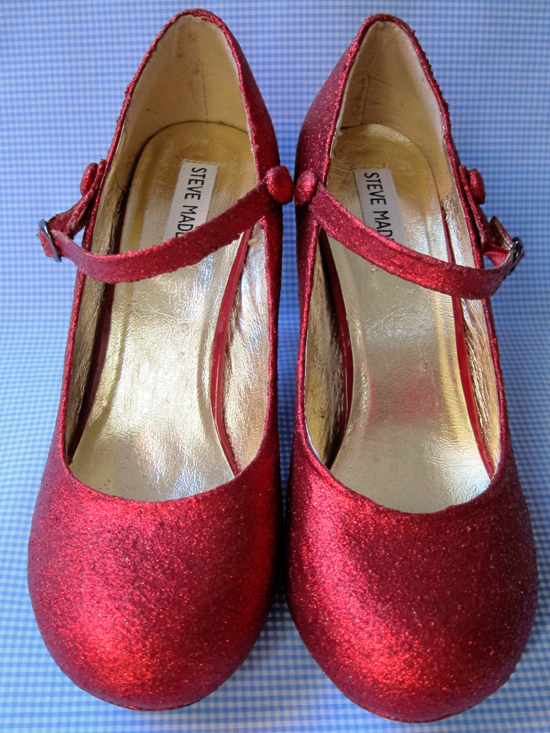
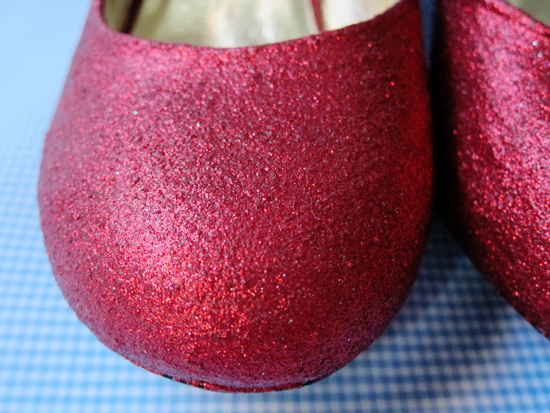
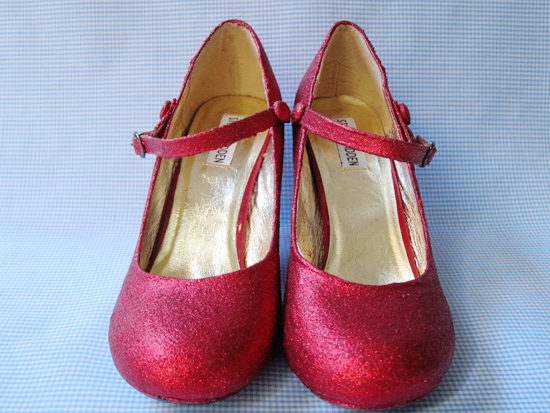
I’ve had my Dorothy Wizard of Oz ruby slipper tutorial in mind for the longest time and finally got around to doing it over Easter – I’ve worn the results out a few times and they’re always a hit, plus it was a great way of up-cycling (and my first attempt!).
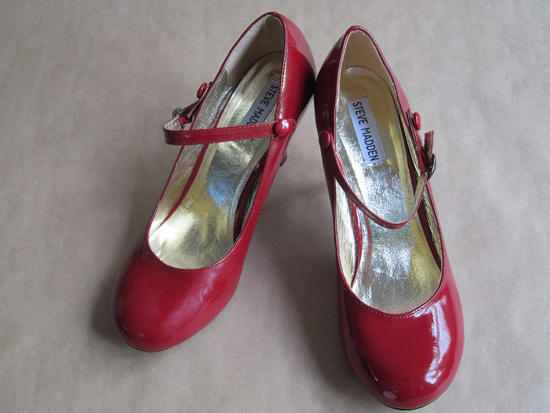
I bought these cute red shoes over the phone when the store I was in was out of my size. Little did I realise the “gold look” described over the phone made the shoes unwearable – the camera struggles to pick it up, but one shoe had a metallic, dull gold finish and my beautiful red patent leather heels ended up looking very strange! Before I could return them, the shoe company closed down and alas, I was left very regretful.
I thought these would make fantastic wedding shoes, so wanted to share my own step by step tutorial for glitter shoes.
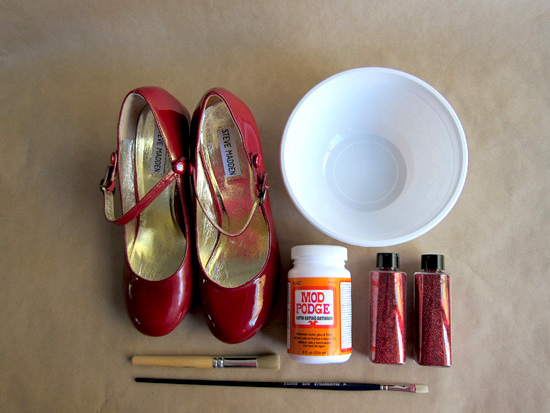
What you’ll need:
- A bottle of Mod Podge
- An old stiff brush
- Bottles or tubes of very fine glitter
- Very fine sand paper
- Disposable bowl
- Old newspaper or tissue paper
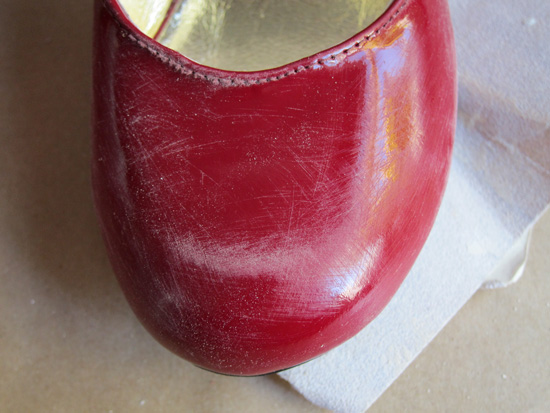
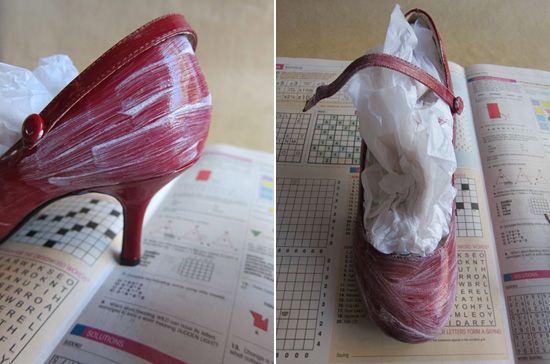
1. Sand your shoes, you may not have to do this on plain leather, but the glossiness of patent leather definitely requires it otherwise the paint will crack off when dry!
2. Stuff the shoes full of tissue paper or old newspaper so they keep their shape, and so you don’t get any glue inside the shoe.
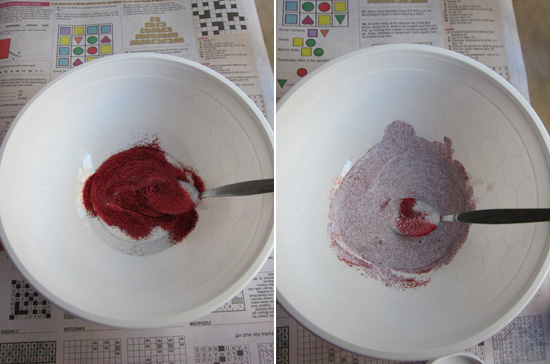
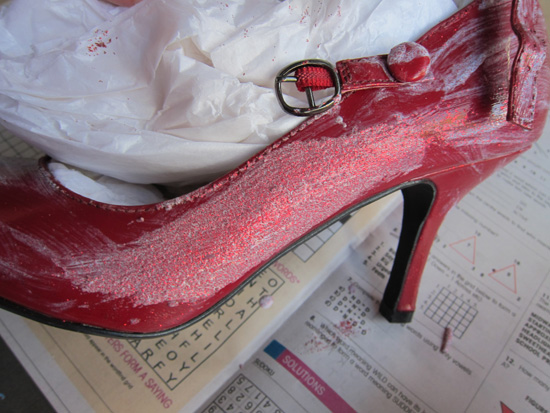
3. Mix a small amount of Mod Podge with glitter and paint all over the shoe. I decided to mix Mod Podge with the glitter so that the glitter was “in” the glue. This worked really well as the sparkles don’t fall off every time I moved my shoes. Don’t worry if the glue is streaky – it dries clear so you won’t see the brush marks once you have built up the glitter.
4. Add more glitter to the glue and start painting onto the shoe with your paintbrush. You can add as much glitter as you like but I used an entire bottle for this project to ensure I had good coverage.
5. Check the coverage as each layer dries and keep adding extra layers until you are satisfied with the coverage.
6. Be sure to keep wiping down the sole and inside of the shoe from stray glitter glue drops, otherwise you can scrape these off pretty easily with a blunt knife or metal ruler after the shoes are dry.
7. Leave to harden (preferably for a few hours).
8. As a final precaution, paint the shoes entirely with a layer of pure Mod Podge – as a sealant if you will, to keep the glitter on.
9. If you’re wearing Mary Janes like mine, you might have to poke your holes in the straps again. I also went over the inside edges of the shoes with fine sand paper to ensure no rough glitter rubbed against bare skin.
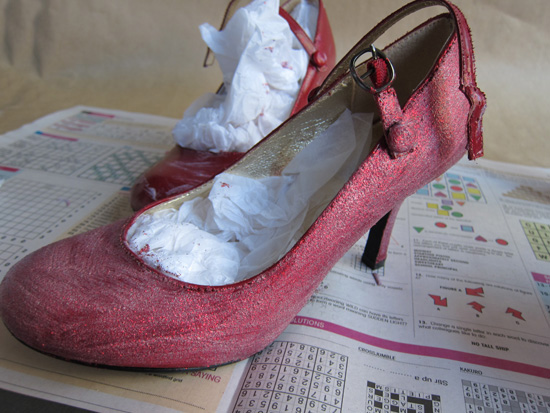
10. Voila! Your very own pair of ruby slippers!
Ms Polka Dot’s own photography.
Ms Gingham says: There’s no place like home … There’s no place like home … Unless you’re out on the town with these ruby shoes then I suspect home can wait for a little longer!






Cute shoes! Now all you need is a gingham dress and pigtails!
I LOVE this!!! I alwys said I wanted to wear Dorothy shoes for my wedding …. and I might be able to now lol. Sorry bling purple shoes you may be tossed aside
Pretty 🙂 Love the mary jane style too!
Magic things happen when I swear these beauties- I meet amazing people, I have the most amazing conversations and I ALWAYS have a fantastic night! Definitely worth making a pair of your own.
That’s exactly how I sparkled my ‘something blue’ shoes that you featured yesterday! Great minds 🙂
how fun are these?!!!
seriously AWESOME!!! Im so going to make some of these 🙂
SO awesome! What a pretty red.
Great tutorial. I’ve got all my supplies and am ready to go. Thought I should look up modpodge glitter to make sure I did it right. Never thought about sanding to scuff up the patent leather. Sooo glad I found your site. Thanks so much for sharing!