

When planning your special day, the most important thing to remember is to have fun! Your wedding day is a celebration of your love for one another, in front of your favourite family and friends. And what better way to celebrate than with confetti?
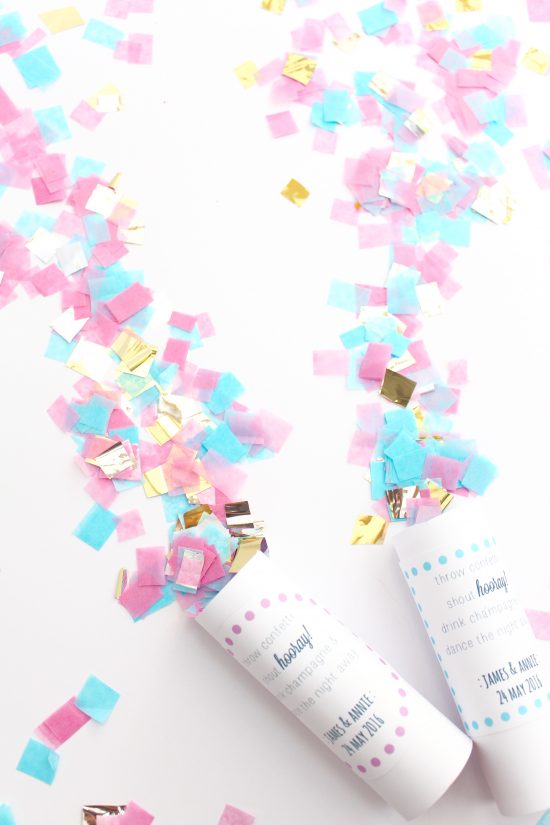
These sweet hand-cut confetti throwers are a wonderful way of incorporating a little colour and fun into your ceremony. Not to mention creating the perfect photo opportunity! Have a basket or box of these pastel confetti throwers for your ushers to hand out as guests arrive at your ceremony and add some instructions to toss in the air and shout ‘hooray’ as you walk back down the aisle together. A beautiful explosion of love, colour and sparkle.
You Will Need:
Wrapping paper rolls (we used one to make six throwers)
White card
Tissue paper in various colours for the confetti
Gold or silver foil paper
Additional tissue paper cut into inch-wide strips
Scissors
Glue tape
Computer & printer (to create the labels)
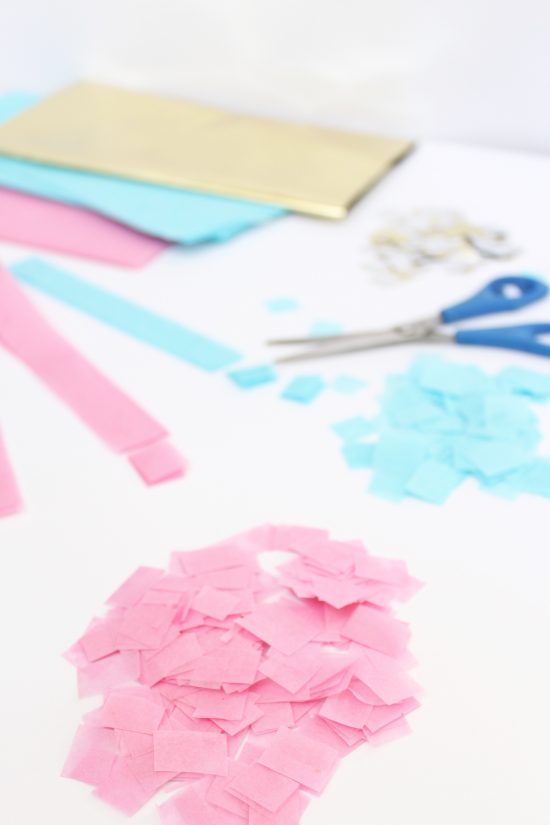
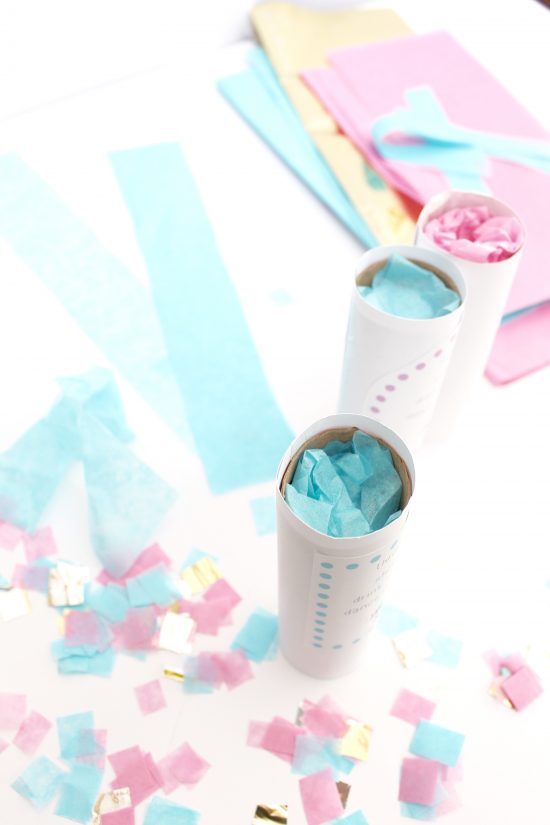
Step One. Making the confetti is the most fun. Choose tissue paper colours that complement or contrast with your wedding palate. Cut the papers into strips and then cut the strips into confetti-sized squares. You will need approximately two tablespoons of confetti for each thrower.
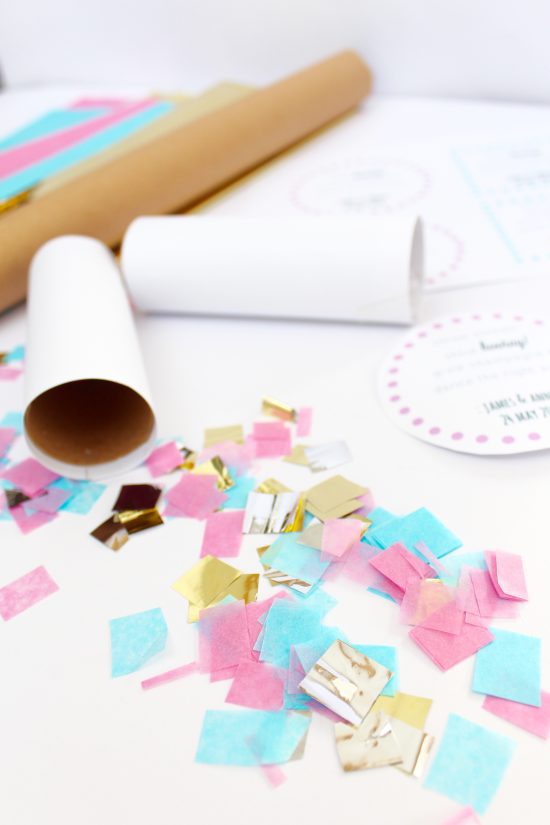
Step Two. Cut a wrapping paper roll into six equal smaller rolls. We cut each roll to be 12cm long. Repeat for how many confetti throwers you are making.
Step Three. Using white card, cut a piece slightly longer than the roll and secure it with glue tape. This will make the confetti throwers look uniform. Or if you are feeling daring, you could choose a patterned paper – think black and white chevron or a colourful floral.
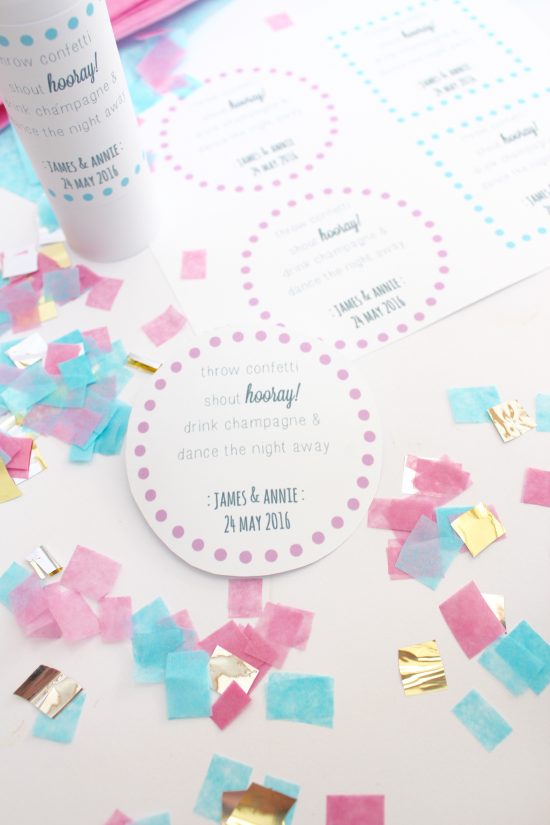
Step Four. We created a printable label for the throwers with PicMonkey. Print, cut and attach the label to the confetti thrower with glue tape. Alternatively, for a more whimsical look you could hand-write the white card before wrapping around the roll.
Step Five. Using the inch wide strips of tissue paper, scrunch and fill the tubes until they are two-thirds full.
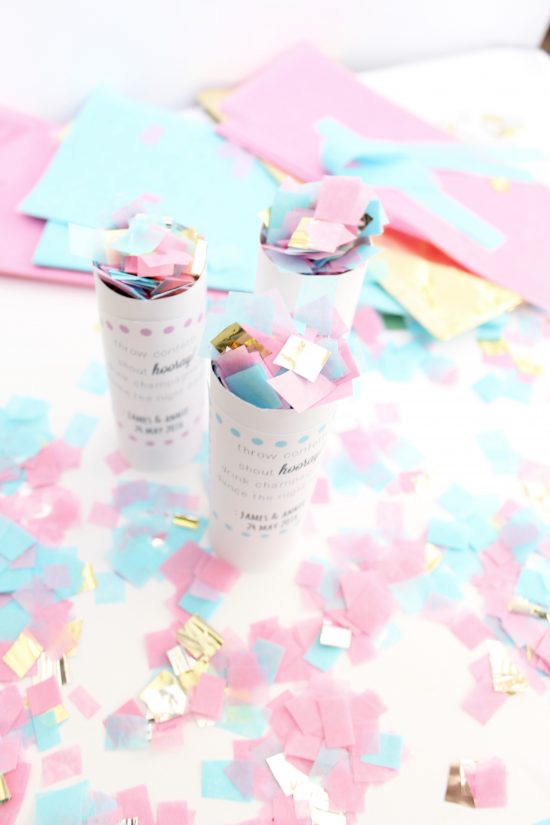
Step Six. The confetti throwers are now ready to assemble. Place the tubes upright into a container, preferably one with a lid for easy transport. Spoon approximately 2-3 tablespoons of confetti into each tube. If you are worried about the confetti spilling during transport, save this step until the tubes are at the ceremony. It is a quick process spooning the confetti into the tubes.
Step Seven. At the ceremony, have your ushers transfer the confetti throwers from the container to a box or basket on display for guests to take or ask them to hand out the throwers as guests arrive.
Other Hints & Tips:
- Have fun with your colour selection! Choose tones that contrast with each other and create a fun statement. The addition of foil paper adds a much-needed sparkle. If you are looking for something more subtle, go for all one colour in a soft pastel. Cut up a few different options and see which you like best before buying all the paper.
- The confetti cutting can take some time, but if you start ahead of when you need it, you can slowly but surely create the amount you require without it being tiresome. Cut a few strips each night as you unwind in front of the TV and it will be finished before you know it!
- Have a play around with words and what you want to write on the confetti throwers – use a beautiful love quote or lyrics from your first dance song – be creative!
![]()
Ms Chinoiserie Says: Oh, I’m in confetti heaven! How pretty are these throwers – a wonderful celebration of love and colour!
About Jess Bauer: Hi, I’m Jess and I’m a writer. I am a lover of words and stories, pretty papers and flowers. I find great satisfaction in creating something beautiful from the simplest of materials and am happiest in a home bustling with conversation and music, sitting at a beautifully decorated table surrounded by good friends and delicious food – with a glass of champagne in hand, of course!


Join the conversation