

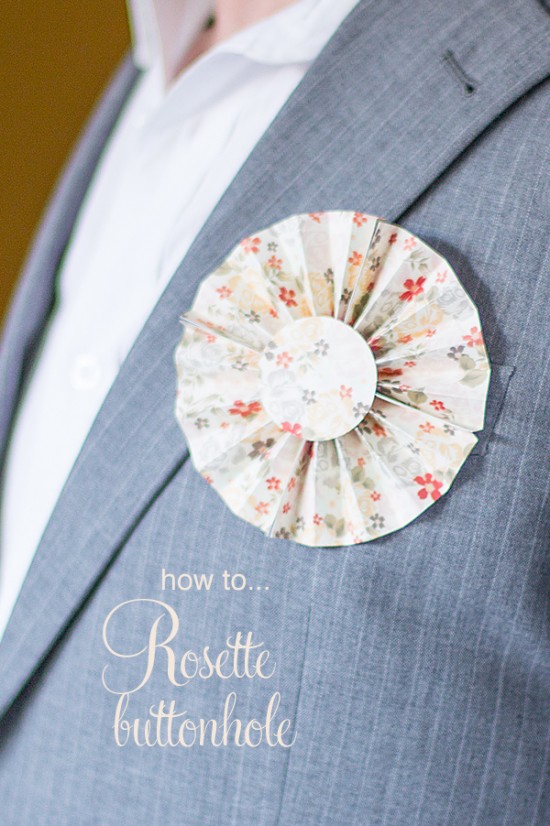
Last week we had a sweet paper craft for the ladies, now here’s one for your #1 gent. A DIY rosette buttonhole made out of paper!
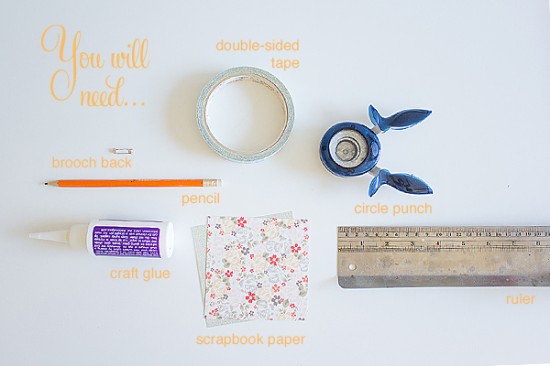

1. Cut a sheet of patterned scrapbooking paper into quarters. Take one of the 15cm square sheets and rule 1cm increments along the back of the paper. Accordion-fold along the lines, using a scoring tool if you have one. Repeat with a second sheet.
2. Fold in half to form a bow shape.
3. Join the two pieces together using double-sided tape.
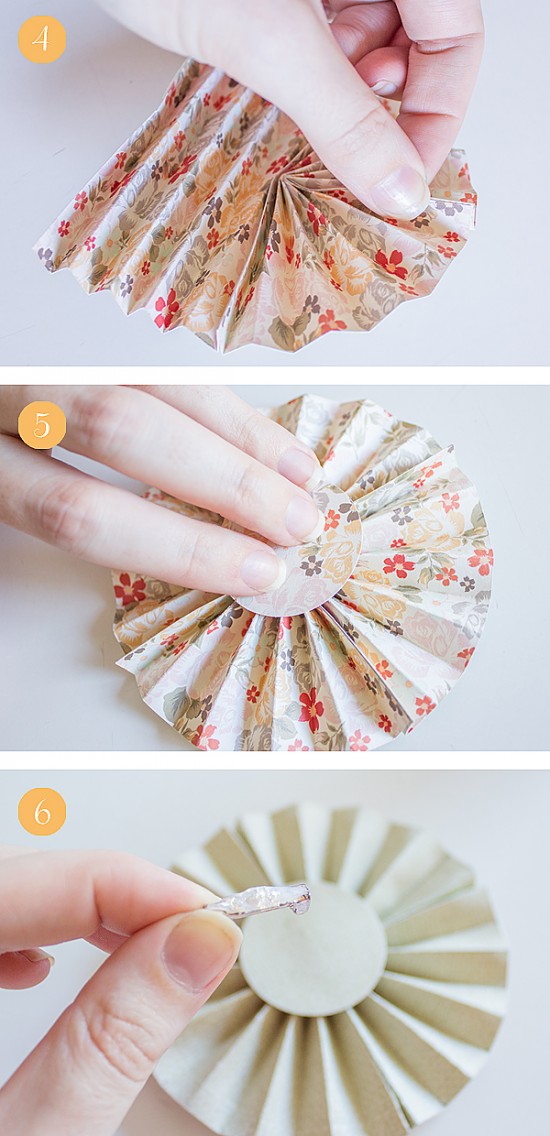
4. Now join each half to itself, again using double-sided tape.
5. Punch two 4cm circles out of one of the remaining sheets of paper using a circle punch. Using a tiny amount of glue, attach one circle to the centre of each side of the rosette (try using a toothpick to apply the glue to the top of the folds). Set aside to dry.
6. Glue a brooch back to the centre of the circle on the back of the rosette. Allow to dry completely.
A fun vintage-inspired alternative to the traditional floral buttonhole.
![]()
I am Alicia Parsons, the Atypical Type A. I live in Adelaide, South Australia in a modest townhouse with my new hubby Ryan (aka The Man). I am the owner and graphic designer behind Akimbo, which specialises in quirky invitations, announcements and greetings.
Alicia contributes regular DIY projects to Polka Dot Made. You can view her posts here.


Join the conversation