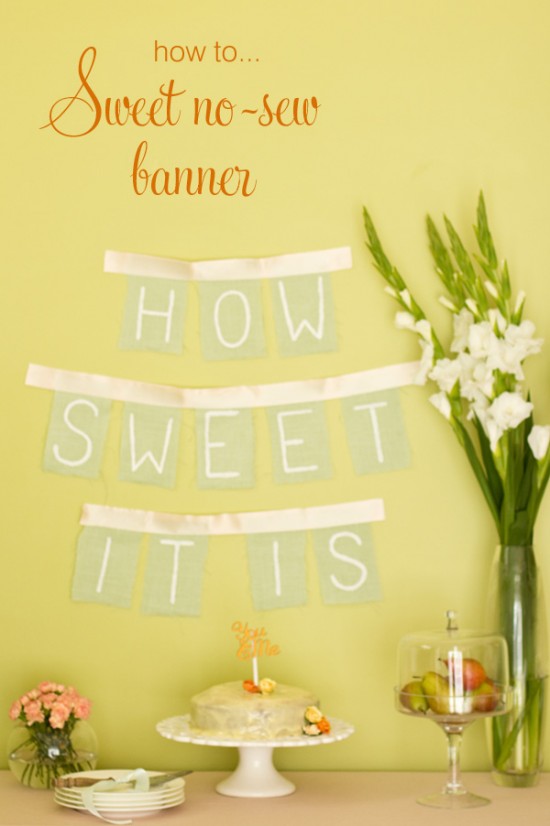
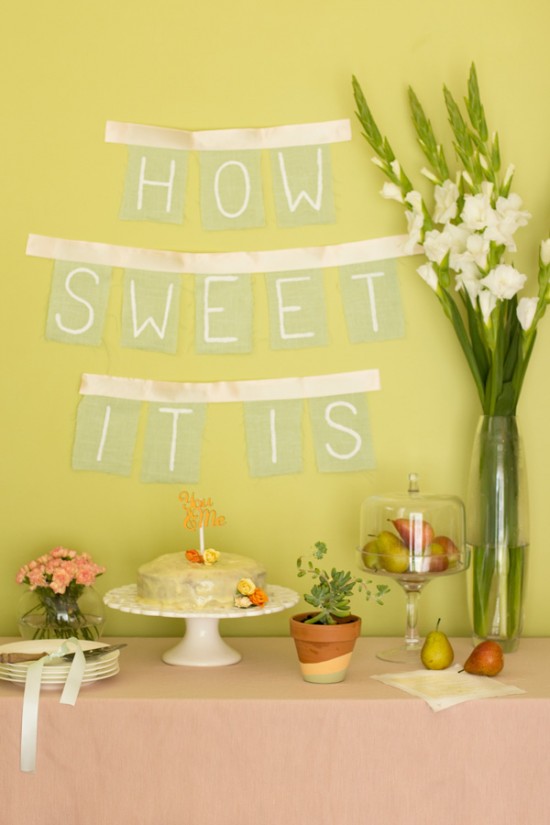
Whether you’re having a dessert buffet or not, this oh-so-sweet no sew banner will add an adorable touch to your wedding reception.
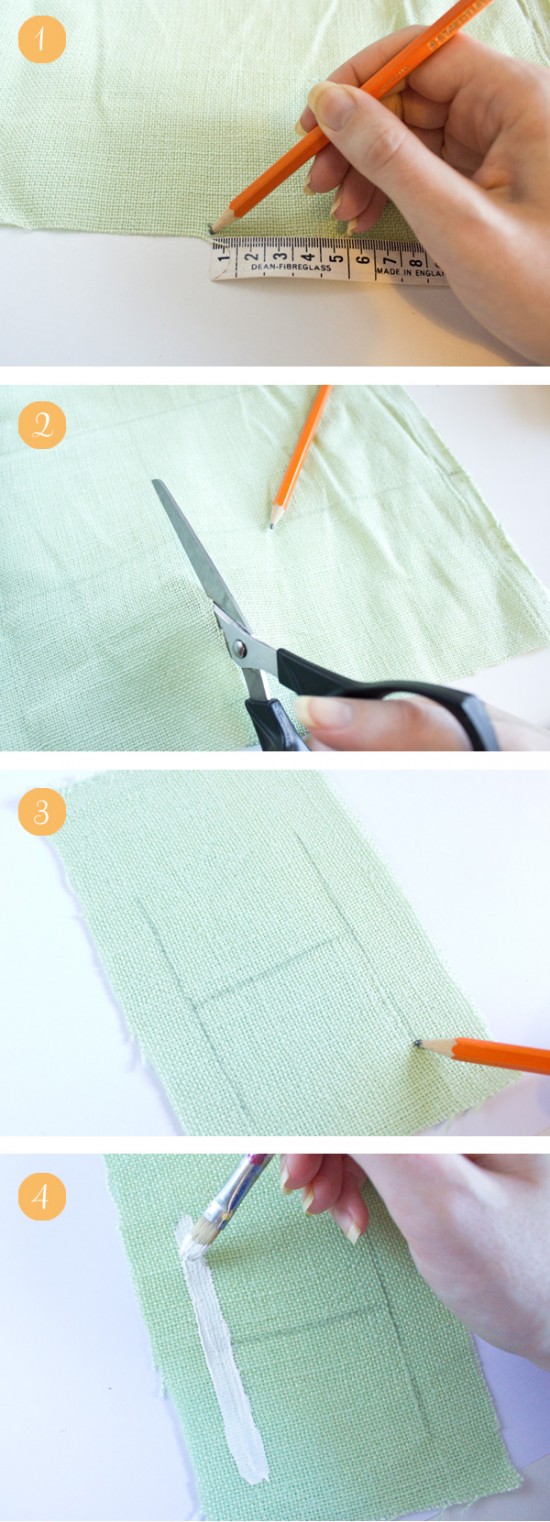
1. Measure out equally-sized rectangles on the fabric, one for each letter of your message (mine were about 11x18cm).
2. Cut your rectangles out from the fabric.
3. Turn the fabric rectangles over so that any visible pencil markings are now on the back. Sketch out your letters in pencil, making sure to leave a small margin on the sides and bottom, and a much wider margin at the top to allow for the ribbon. If you’re not confident drawing the letters freehand or if you want fancier letters, print out your message at actual size onto regular paper, then use a lightbox (or window) to trace the letters onto the fabric.
4. Carefully paint your letters. Set aside and allow to dry. (If it is not opaque enough once dry, repeat with a second coat.)
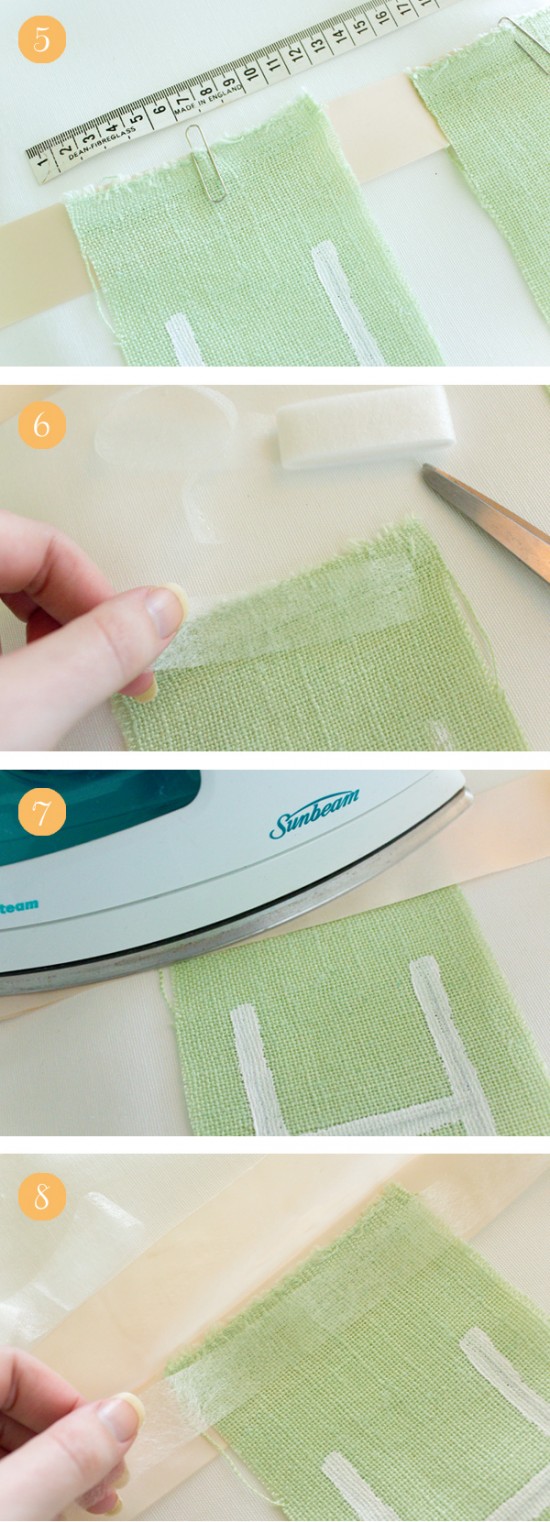
5. Evenly space your letters out against the binding ribbon and secure with paperclips.
6. Cut a strip of hem tape and place it on the reverse side of the top of the lettered piece of fabric. Carefully place tape-side down onto the inside of the binding ribbon.
7. Fold the binding ribbon in and gently iron until hem tape is secure. Repeat with remaining letters.
8. Cut another strip of hem tape, this time the full length of the binding ribbon. Lay it along the tops of the fabric pieces on the inside of the ribbon. Fold the ribbon back in and gently iron until secure.
Optional: For a more long-lasting finish, iron interfacing onto the back of the fabric at Step 1 to prevent fraying.
And there you have it! A lovely banner that you can customise with your names or any message you wish.
You can play around with different fabric and lettering to find a style that works for you.
Ms Gingham says: This is a fantastic way to make a banner without needing to get out the sewing machine.
I am Alicia Parsons, the Atypical Type A. I live in Adelaide, South Australia in a modest townhouse with my new hubby Ryan (aka The Man). I am the owner and graphic designer behind Akimbo, which specialises in quirky invitations, announcements and greetings.
Alicia contributes regular DIY projects to Polka Dot Made. You can view her posts here.




Join the conversation