

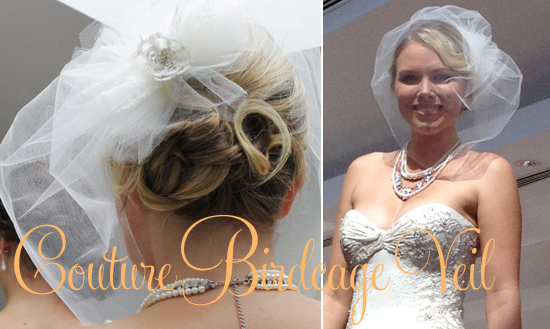
Over the weekend, I had the pleasure of being invited to style a bridal look, for a curvy figured bride at The Glen shopping centre’s bridal showcase. My gown from Mariana Hardwick was chosen to accentuate this particular body type and happened to scream “couture”! I was keen to do it justice and decided that a handmade veil was just the thing. I was so pleased with the look and how relatively simple it was to achieve that today, I’m sharing the process in this DIY tutorial.
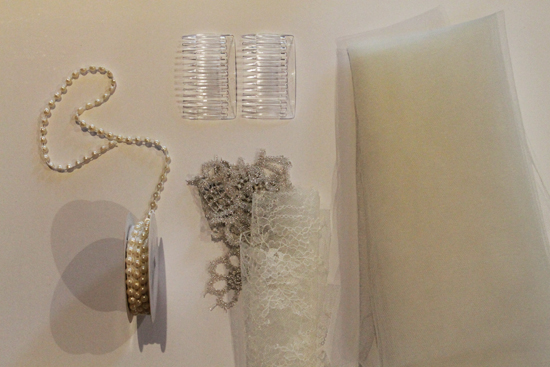
You will need:
- Tulle in chosen shade – I went for an off-white to complement my dress. Tulle comes in various degrees of “stiffness”. Mine was quite soft but you can go for a firmer fabric if you want a more structured look.
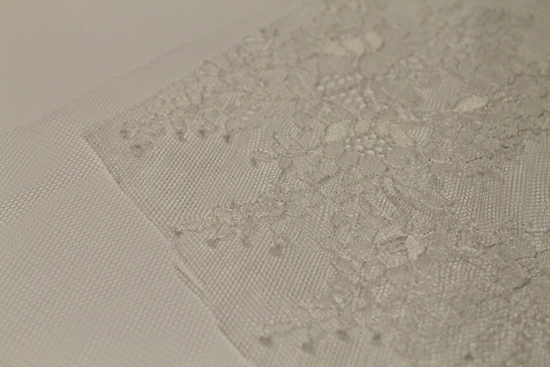
- Fabric offcuts from your gown – If you are getting your dress made then chances are there will be fabric offcuts that your dressmaker should be more than happy to share with you.
- Comb
- Needle and thread
- Embellishments of choice (pearls, crystals, lace, feathers …. you are only limited by your imagination. Remember however to not go over the top. Stick to the style of your dress to make it look perfectly matched).
Step 1. The Flower
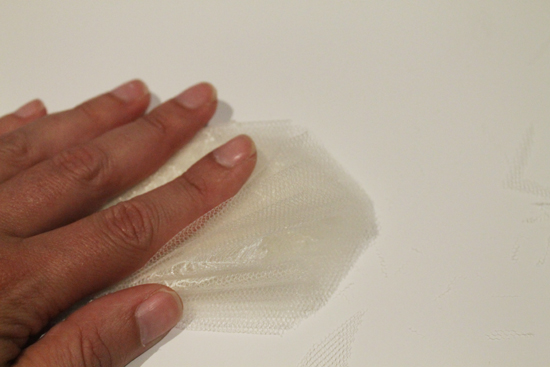
Cut a length of tulle around 70 or 80 cm long and 20 cm wide. Also cut a smaller strip of tulle around 10cm long that you will use to tie your flower in the middle. Lay as much of the biggest piece of fabric offcut on top and then proceed to fold the two fabrics together “accordion” style.
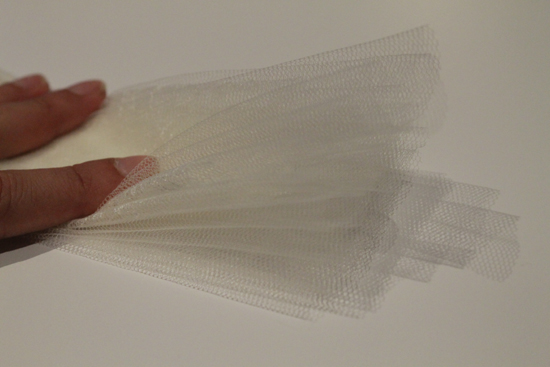
Step 2.
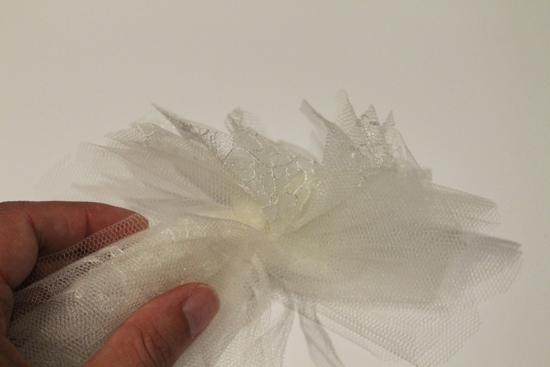
Trim your ends neatly into a soft round edge whilst holding your folded fabric firmly in place. Once trimmed, use your strip of tulle that you have pre cut to tie your folded fabric firmly in the centre. Once tied, spread out and separate the petals of your flower.

Step 3.
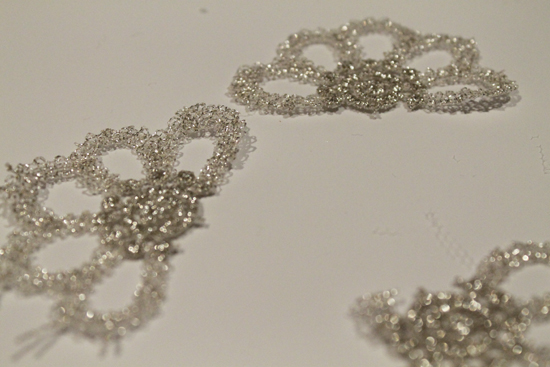
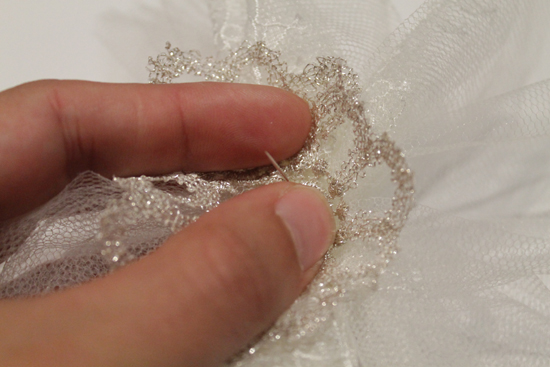
It’s now time to embellish your flower. You will no doubt have your own embellishments but for my flower, I used some of the divine feature fabric. I studied it and saw a pattern from which I was able to cut 3 identical pieces from. I then put the pieces together to form the centre of my flower and sewed them on. I was lucky enough to have some truly divine fabric to work with but you can achieve a similar effect using beads, crystals or lace.

Step 4. The Veil
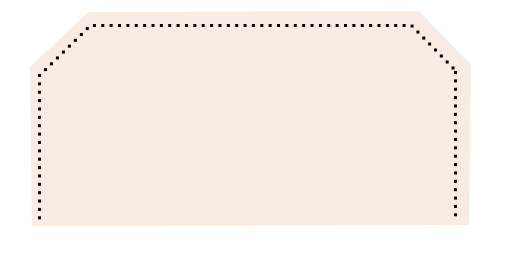
This part is much easier to do than it is to explain! First, cut a piece of tulle in a rectangular shape. The size of it will depend on how long you want your veil to be. Lay your rectangle flat and cut off the two top corners. You don’t need to be very exact with this but aim to take about a quarter of the length and width off. Take your needle and thread and with long stitches start sewing from the left bottom corner, up to the left top corner, across the top and down the other side. Do not sew along the bottom (see diagram). When you’re finished, pull the thread firmly so that the veil puckers up on one side and then secure the end. Snip off the excess.
Now sew this onto your comb. Make sure to secure the veil well. Once the veil is on, secure your flower to the comb and that’s it!
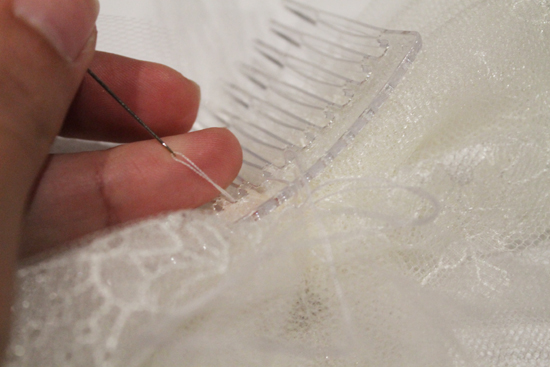
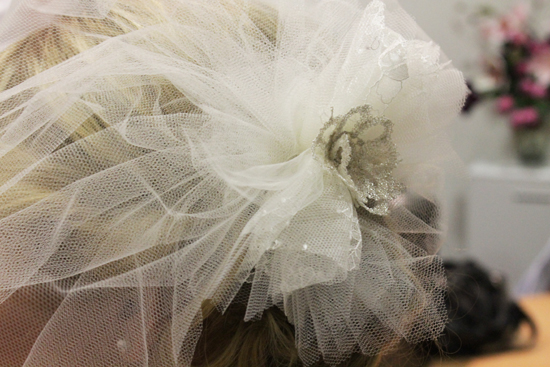
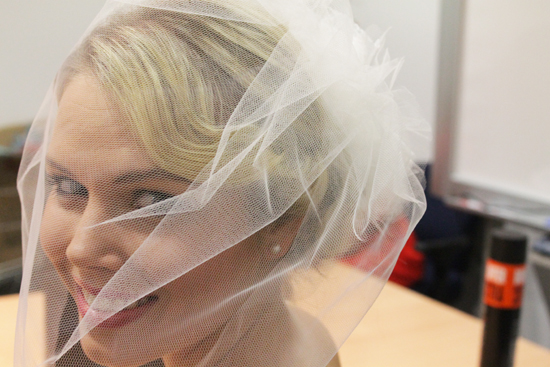
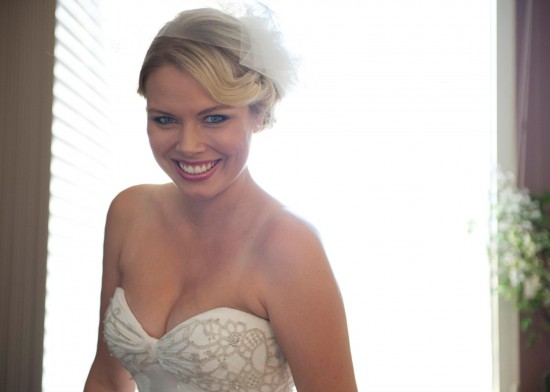
Image courtesy of The Glen
Photography by Ms Gingham
![]()


Creative and gorgeous Ms Gingham!
You are a dynamo! Sensational! xx
I am very impressed! Birdcage veils are so classic…
would love to see how this looks when it’s pulled back– as in how bride would wear it after the ceremony and at reception.
Hi Cami. I have added an image in the post which shows how the veil looks when it’s pulled back. The model wore it both ways on the day and it looked gorgeous! 🙂