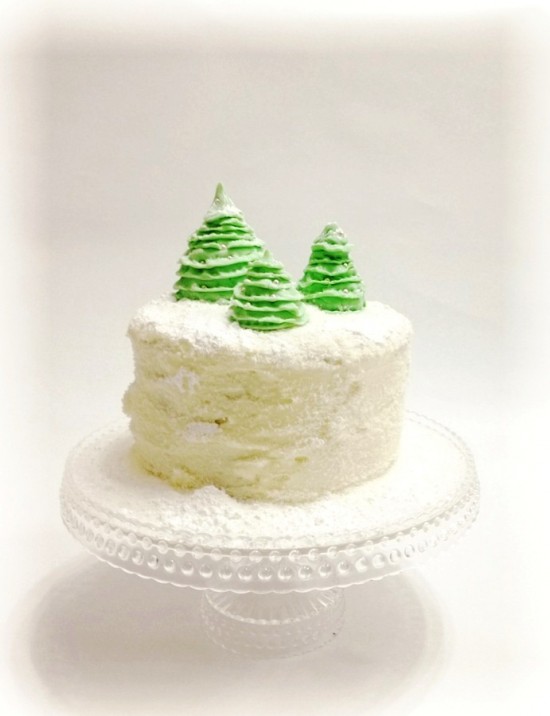
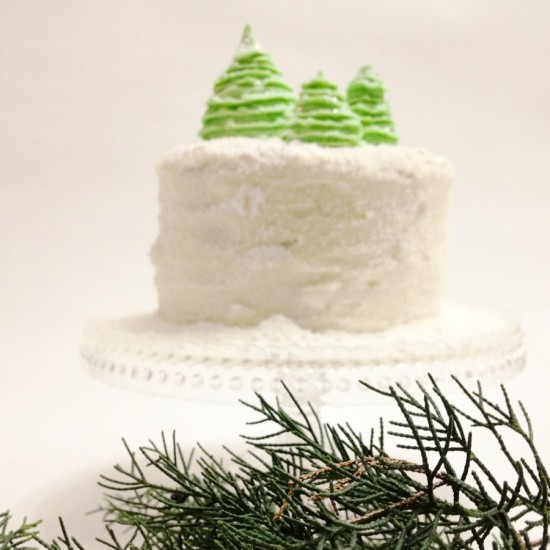
I know we don’t have white Christmases in Australia, (although we nearly did last year!), but I love white. I love it because I LOVE colour and I find that white is perfect for offsetting all the other colours, so it doesn’t matter what colour is the favourite at the time, white is always there to help it shine. (Oh, gosh, that rhyming was not intentional!). This Christmas I am using white as a background for the other colours I use. I am a big of t fan of centrepieces at the Christmas table and what better than a themed Christmas cake? My Nanna, my mum and now I have always had cake toppers on the Christmas cake. For this cake I had a lot of fun making ruffled fondant Christmas trees, so not only are they pretty but they could also be eaten by someone who is willing to eat that much fondant and colouring! The trees are nestled in a white coconut snow icing. So here’s how I did it.
You will need:
- White fondant icing or Edible Gum Paste
- Green food colouring
- Balling Tool (or the end of a paintbrush as I do!)
- Baking paper
1. Knead your green food colouring through the fondant icing adding colouring slowly until you have the shade of green you like.
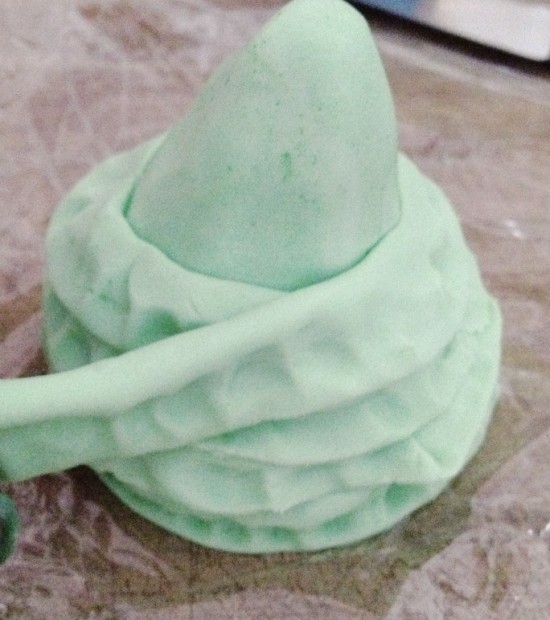
2. Take a ball of green fondant and roll it into a shape about 5 cm tall and 3cm wide, then plonk it down on some baking paper so it’s flat on the bottom and shaped it into a cone shape.
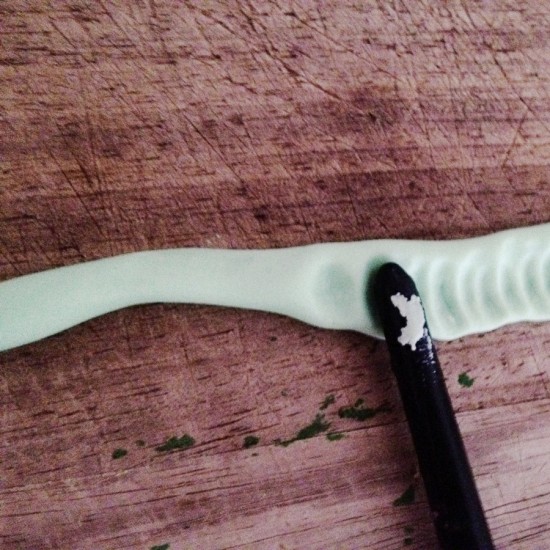
3. Roll a very thin (about 1cm wide) snake and cut it into manageable strips of around 15cm long. Using the balling tool or the end of a thin paintbrush (as I do, lol!), ‘ruffle’ one edge of the snake, gently pressing it down all the way along.
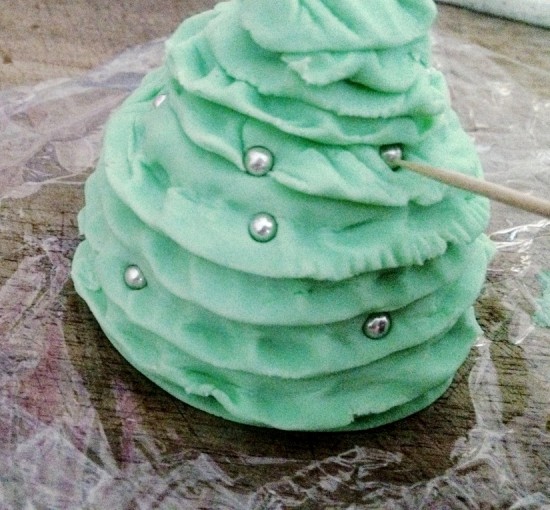
4. Pick up the ruffled strip, and starting at the bottom of the cone shaped tree, gently press the non-ruffled edge onto the tree, turning the paper and tree as you go so that it spirals around, working its way up the tree in layers. Each new ruffled strip starts at the same spot as the last one had ended and overlaps slightly until the ruffles reach the top of the tree. Using three fingers and a thumb, pinch the top of the tree to create a nice tree top shape.
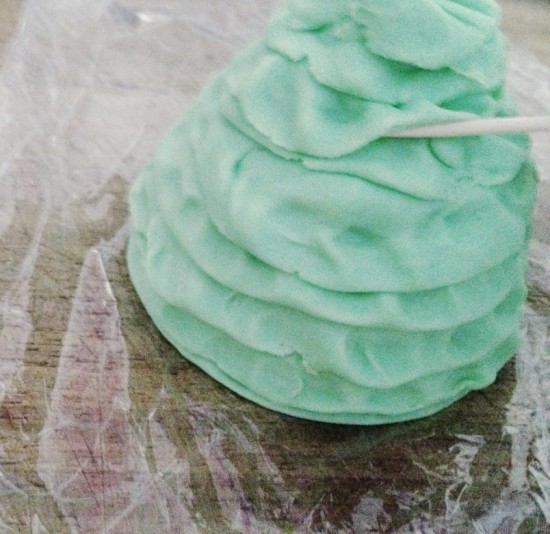
5. This next bit is possibly the most important to the look of the tree. Using a toothpick, gently lift the ruffled layers as they start to dry and harden so that they didn’t sit flat on the tree, I really think this makes them pretty. Do this once straight away and after 10 mins or so come back to them and do it again to make sure they are nice and ruffley as they dry.
6. After the first time you lift the ruffles, before the icing is starting to dry out, gently place silver cachous into the ruffles and then push them in further with a toothpick to make them look like they have baubles. I think the little bit of bling makes them more Christmassy, don’t you?
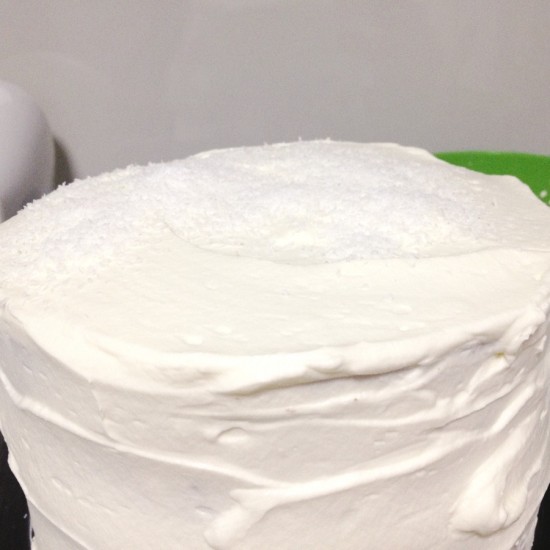
To display the trees on your cake, ice it with buttercream (or as an alternative you can mix whipped cream with icing sugar mixture) and then dust it with desiccated coconut (snow). Place the trees on top and then give the whole cake including the trees another light dusting of icing sugar.
Let it snow!
Images by Twiggy Nest
![]()
Ms Gingham says: Very, very nice and simple too!! Thanks Anna!
Anna says: “I am a decorator, artist and blogger who loves DIY. With years of experience in teaching I have created an ever growing blog full of easy to follow tutorials. I take my own photos and pride myself on originality and a fresh perspective and twist on well known ideas. Although my blog has a range of ideas for all ages and styles I love creating wedding and party inspired DIY and I loooooove flowers, fresh, fabric or anything floral! “




I am looking to get in touch with Twiggy Nest about this christmas tree tutorial. Please email me when you get this.. Thank you!
Essa aumento já é bastante popular entre os praticantes a
musculação e fisiculturistas profissionais.
There’s definately a lot to know about this issue. I really like all the points you’ve made.