Lets face it, weddings can be pretty darn expensive and occasionally even the best of us have to look for ways to save a few dollars! The good news is, saving dollars doesn’t have to equate to missing out… as long as you’re willing to sharpen up your DIY skills and get crafty!
Here’s a few tips to help you save money by making an awesome DIY photo booth.
The Backdrop
By far the easiest and cheapest backdrop option is to use a wall at your venue. A great wall to use as a backdrop will meet a few criteria:
- It will be non reflective with a matte finish. Glossy surfaces can look great but are a nightmare to light evenly, a matte finish will give you far fewer hassles and a more uniform light. Some great options are raw brick walls and painted feature walls, or simply find a plain painted wall that is in reasonable condition.
- Consider location, your booth needs to be in a position that is close enough to the action so guests will use it, but out of any main thoroughfares where it will disrupt the flow of traffic.
If your venue doesn’t have a suitable wall the next best option is to purchase some fabric from a local retail outlet. Here’s what to look for in fabric:
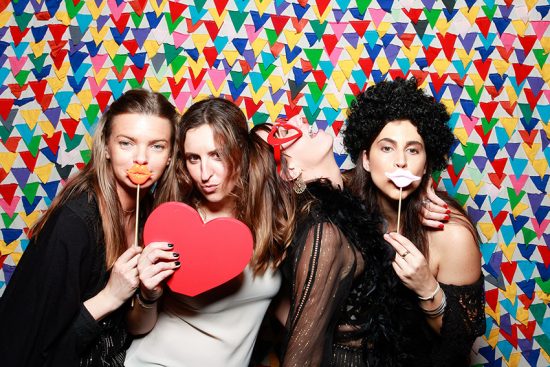
- Simple patterns tend to work best, ahem, polka dots are a great choice! Muted tones and zig zags are also great. A simple fabric backdrop can be spruced up with some bunting; it’s super easy to make your own out of fabric or paper and twine.
- Pick a fabric that won’t wrinkle too badly. Giving it an iron prior to hanging is a good idea to reduce wrinkles and make your DIY booth look more professional.
- Most fabric comes in widths of approx 1.5 metres. Purchasing 2 metres of fabric will provide you with a backdrop that measures 1.5 x 2 metres. This will suit your camera’s sensor ratio nicely and allow plenty of guests to squeeze into each photo.
- Fabric can be clamped to a backdrop stand which you can hire from photographic rental companies. Alternatively you can build your own using PVC pipe, there are plenty of easy to follow tutorials online!
The Light
A great photograph is all about the light and the key to a great photo booth is smooth, even lighting. Here’s how to go about it:
- Place your photo booth in an area free of harsh directional lighting. Spotlights or strong down lights will result in harsh shadows and unflattering photos. If you’re having your photo booth outside during the day find an area that is shaded and out of direct sun.
- You’ll need a fair amount of light to get sharp, noise free photos. A good option is to use a camera with a built in flash, or better yet a hotshot mounted flash bounced off a white ceiling.
- If you’re not using a flash, try to fill the area with light, but keep it soft. A great way to do this is bounce light off nearby walls and ceilings. Down lights and spot lights can be pointed away from the booth towards a wall so the light ‘bounces’ back into the booth. You can also help things along by placing lamps and other light sources close to walls near your photo booth.
- Test your lighting by having someone stand in the photo booth, take their photo and have a look at it on your camera. Are there deep shadows under the eyes? Annoying bright spots? Adjust the light as necessary to create the most even lighting you can.
The Camera
- If you already have it, your best bet is to place a digital camera on a tripod. Have someone stand in front of the backdrop and set the camera up so it frames them nicely. Make sure you get most of the backdrop in the frame!
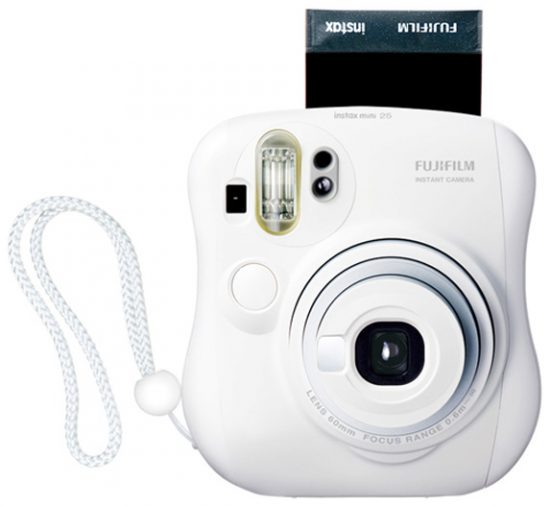
- An instant camera such as the Fuji Instax is a fun choice. Guest will receive photos instantly, but it will cost you a little more in film.
- If you don’t want to spend money on a camera, set up a sign telling guests to use their smart phones in the booth. A nice backdrop and even lighting provides a great location for wedding selfies and guests have a lot of fun doing so! Set up a hash tag and ask your guests to post their wedding selfies to Instagram so everyone can share the action.
Image via FujiFilm
The Props
Last but not least, grab some props! A day spent visiting charity and two dollar shops will provide you with a host of weird and wonderful props for your guest to have fun with. There’s no need to go overboard though, choose a few key items and make your guests be creative with them!
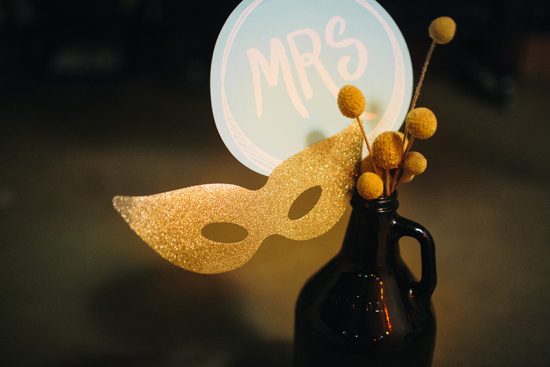
- Use an old bottle or wooden fruit box to create a simple prop stand.
- Paper masks and signs are available from party shops and are always popular.
It may take a little experimentation, but it’s really not that difficult to put together an awesome DIY photo booth. Your guests will have a great time and you’ll capture some great memories of your wedding to boot!
All images by Boothboy unless credited otherwise
Ms Chinoiserie Says: If you can’t have a professional photo booth operator at your wedding, a DIY option may be the next best thing; and of course, we love the idea of a polka dot backdrop!






Join the conversation