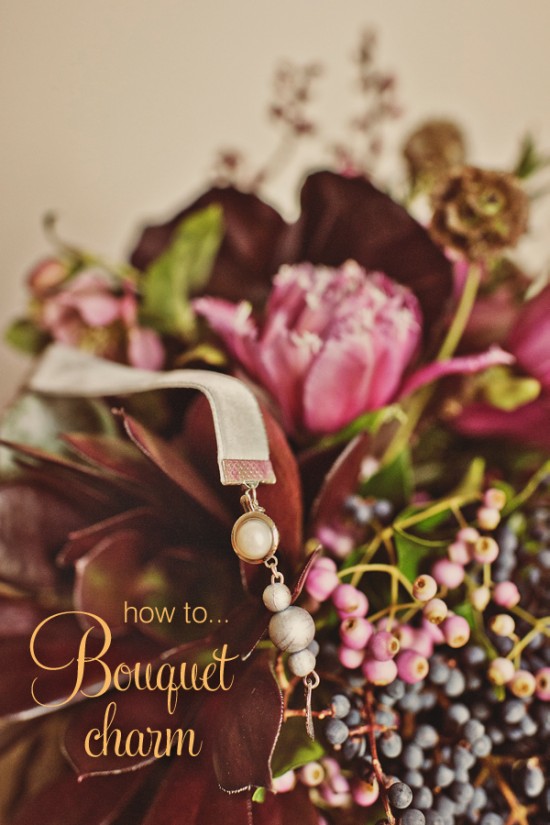
The wrapping of your stems is an often overlooked wedding detail. Why not whip up this sweet bouquet charm for a charming finishing touch to your bridal flowers?
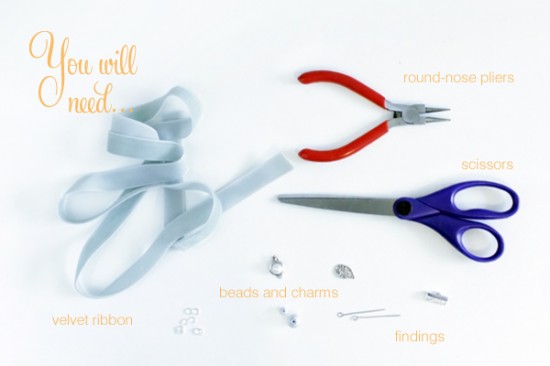
You’ll need an assortment of beads, charms and findings. I used the following (all purchased from Spotlight):
- Eyepin
- Jump rings
- Clamp finding
- Round beads
- Pearl charm
- Mini leaf charm
1. Lay out all of your beads and findings and play around until you find a design you are happy with.
2. Attach the end charm onto the loop of the eyepin, opening it slightly with the pliers if required. Close the loop again using the pliers.
3. Thread your beads onto the eyepin, leaving a 5mm gap at the end. Using the pliers, form a loop at the end of the pin. Attach a charm using a jump ring.
4. Attach the other end of the charm to the clamp using a jump ring; close the gap in the ring using pliers.
5. Insert the end of the ribbon into the clamp and close gently using the pliers. Trim the other end neatly, leaving plenty of excess for your florist to wrap around the bouquet stems.
The only trick is to make sure all of the charms sit flat with the ribbon. If you have one that turns around to the side, simply add another jump ring to turn it around.
In the leadup to your wedding, hand over your bouquet charm to your florist so she can do the stem wrapping for you.
Play around with combinations that suit you and your wedding – you could include a meaningful charm, religious symbol, vintage beads or even make use of that orphaned earring!
Photography: Shona Henderson Photography
Flowers: Poppies Flowers
Styling: ByGabrielle
Tutorial and tutorial photos: Alicia Parsons of Akimbo
![]()
Ms Gingham says: GREAT styling tips. Let your imagination run wild and customize patterns, colours and products to create your own style!
I am Alicia Parsons, the Atypical Type A. I live in Adelaide, South Australia in a modest townhouse with my new hubby Ryan (aka The Man). I am the owner and graphic designer behind Akimbo, which specialises in quirky invitations, announcements and greetings.
Alicia contributes regular DIY projects to Polka Dot Made. You can view her posts here.


How smart! Thanks for the nifty tutorial.
My pleasure, Anna!
That’s lovely. I had a locket with a photo of my dad (who passed away several years ago) on my bouquet so he could still walk me down the aisle 🙂
What a touching idea, Nat.
This looks great, I just got in a new box of findings and swarovski pearls, can’t wait to make up some of these 🙂
Happy crafting!