Securing a venue, caterers and hire companies, dress fittings, liasing with suppliers, menus, invitations, transport, bridesmaids, family … it can all get a bit overwhelming! Planning a total DIY wedding, on a private property can be done without a melt down or the day being a hectic mess. The key? Prepare, prepare, prepare!
My fiance Matt and I are planning our December wedding this year, to be held on my family’s property in country Victoria. The logistics of the day on paper can look like a wedding planner’s worst nightmare. Marquee in the middle of a paddock, no power, no toilets, no access if it is wet with a cocktail hour outside, not many flat areas on the farm to put a marquee and nowhere for guests to park as the site is literally in the middle of a potato paddock. Throw in four bridesmaids, four groomsmen, five flowergirls and one page boy and it’s enough to give you a cold sweat. But I refuse to let it overwhelm, intimidate or fluster me in the lead up to our big day. I have a plan and I’m sticking to it. Here are five easy steps to help out even the most overwhelmed bride…
Step One: Inspiration
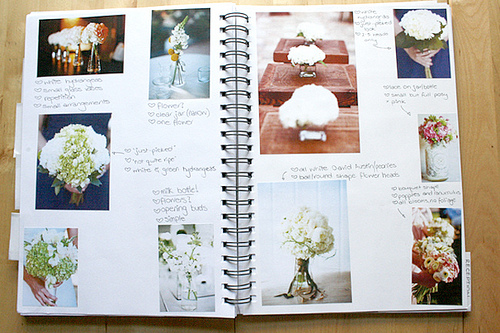
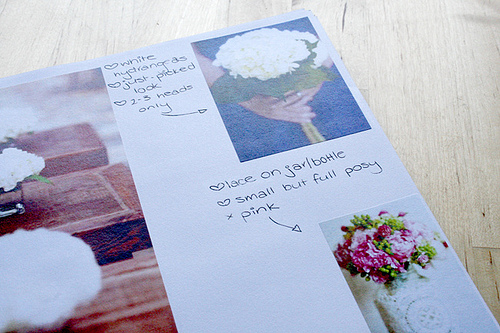
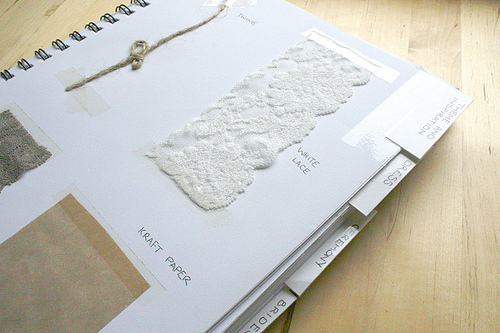
Shortly after getting engaged, I realised my dream wedding was somewhat ‘challenging’ in the logistics stakes. I immediately started my wedding inspiration scrapbooks, scouring wedding blogs, photographer’s sites, craft supplies online and gathering sources for all things rustic with an elegant finish. I started with a loose concept and gathered a few items which gave me my initial inspiration: rough twine, kraft paper, soft lace in ivory and champagne tones.
When looking for inspiration don’t just feel limited to all things ‘bridal’. I went to the local hardware store in the week after we were engaged and perused their paint chip samples to find our perfect colour pallette. I divided my inspiration scrapbooks into several sections with cardboard tabs sticky-taped so that they wouldn’t bend or fray. The various sections include: Theme and Concept, Dress, Decor, Reception, Ceremony, Bridesmaids, Paper Goods, Groom etc. I took my book with me dress shopping, I have it sitting next to my computer to refer to and it’s a constant source of inspiration to stay on track with our ideas and concepts.
Step Two: Lists, lists, lists!
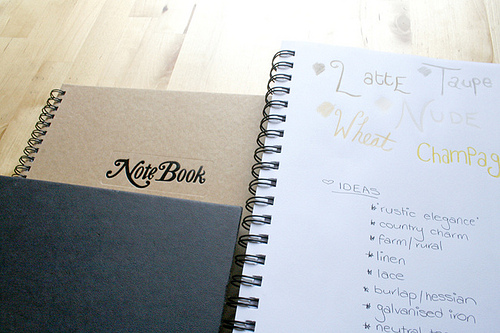
I am a list writer. Even if you’re not a list writer, just try and jot down a rough idea of things that you want to involve in your wedding day – people, places, events, mementos, decor. List anything and everything that pops into your head, and then go about setting priority over some items. For instance our main priorities were food, entertainment and setting. Sure, I might not be organised enough the week before the wedding to make my flowergirl’s headbands, but as long as our guests were fed really well, had great music and a memorable evening in our home we would be happy. Don’t sweat the small stuff.
Step Three: Get Sketchy, Get Creative
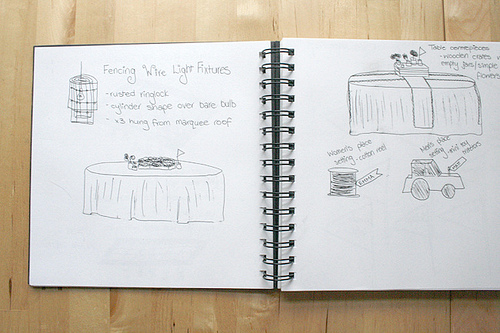
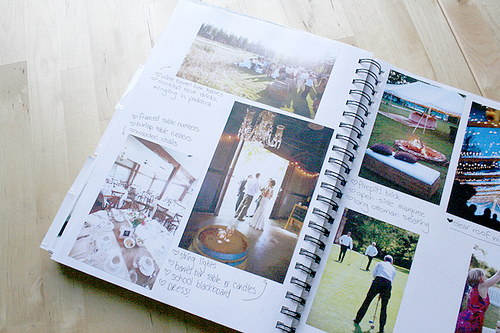
I am by no means a sketcher. But if you have an idea and nobody seems to understand it or if you’re frustrated that you have a vision that you can’t see fulfilled, sometimes sketching it out in a little book can do wonders to release some creative juices. For our wedding, I want my fiance Matt to construct a few things that I conjured in my mind – light fixtures for the marquee made out of twisted rusted fencing wire, an industrial pallet and glass jar chandelier to hang over the dancefloor, wooden signs to direct our guests. I roughly sketched all of these things in my little wedding black book and refer to them when I lose sight of what our overall vision is. I also set out a sketch of how the table centrepieces were going to work, as well as a rough floor plan to determine how much room we would need for a suitably sized marquee. I also sketched out our outdoor cocktail hour with lawn games, wine barrel bar tables and hay bale couches. If it’s on paper you will be able to recreate it more easily, without much hassle or stress. It doesn’t have to be the Mona Lisa, just a simple diagram will help you see the bigger picture.
Step Four: Budget, Expenses and Finance Department
From as early as possible, set a realistic budget between yourselves, your parents and/or your fiance’s parents (or whoever else may be contributing to the wedding). List the main expenses for the wedding, these usually being the food, alcohol, reception hire costs, any equipment hire costs, a band or DJ and the bride’s dress. Anything estimated to cost more than $1000 list in your budget. Add an extra 20% for extra measure or nasty surprises. Try and be as realistic as possible. As you start to book suppliers and pay deposits, keep a detailed record of what was quoted, what was paid and by whom. A simple way to keep track of everything is to set up a bank account, call it ‘The Wedding Fund’ and have all those that are contributing to the wedding able to see what is going in and out of the account. This way it is easy for the bride, groom and both sets of parents to contribute or see how much is being spent on what. This is a system we have set up and find really easy and useful.
Step Five: Spreadsheets are your friend!
After I sat down with all of these ideas swimming in my head, I could clearly picture what our wedding day was going to look like. You now have to ask yourself how you are going to implement it all. I started an Excel spreadsheet which has grown to be a labour of love. It lists the item needed, from rose petals for the ceremony aisle and transportation to photography locations and which illustrations to use on what piece of stationery. Add a column for the supplier or person responsible, a column for the quantity or date required by, a column to check off it is completed, received or organised and a column for how much it cost. I also keep our budget/expenses list as a spreadsheet as well as a current list of suppliers, their contact details and DIY projects currently underway or needing to be completed and by whom.
Most importantly – HAVE FUN! It should be loads of fun planning your wedding, not a major drama or a frightening experience. Make everything about you and your fiance and you will be not only an organised but most importantly, a glowing bride.
Photos by Emma Durkin Photographics
Ms Gingham says: What a fabulous idea. It sure beats running around at the last minute with a crumpled up piece of paper with your “to do” list on it! Some great ideas also regarding finances which can, traditionally be a source of friction. Thanks so much to Emma for these valuable pointers.
Emma says: I am a 24 year old country girl who lives on a sheep and potato farm in the beautiful green Gippsland hills, Victoria. My hubby-to-be and I are high school sweethearts and are planning an early summer 2011 wedding on our farm, full of rustic elegant touches, hay bales, lace, kraft paper and logistical nightmares of having a marquee wedding in the middle of a paddock! I share all our adventures on my blog Cinderella at Brindabella.
Click here to read more about Emma’s wedding preparations.





Looks way organised! I started with that intention but have ‘strayed from the organised path’ as it were :p I should get stuck back in to it, I’m sure it would make it easier. I agree completely about the lists; without lists my life would not function!
Emma, you’re an inspiration to other brides! I’m sure many will take your advice and be much better of for it.
Emma you are AMAZING! What a brilliant article and what an organised bride to be you are!
Thankyou for sharing your tips with us
Emma, Your organisation is inspiraional!
I have almost exactly the same image in my head for our wedding – Marquee in a paddock. I’m curious, how did you go about your ‘no power, no toilets’ issue?
Many thanks