

If there’s one thing that’s almost a pre wedding ritual it’s the wedding manicure. There’s that special feeling a few days before your wedding day of getting your nails done with your girlfriends at a salon or pulling out your favourite polishes and doing them at home!
Since a good old manicure is an easy way to make oneself feel pampered at home, I thought I’d dive in with some of my favourite products and steps to getting a picture perfect manicure at home. I’m no expert – I’ve often sat for ages perfecting my nails only to smudge them and get frustrated, and take it all off. But there are so many great products out there designed to make it easier and nothing quite feels as good as mastering a manicure that looks amazing!
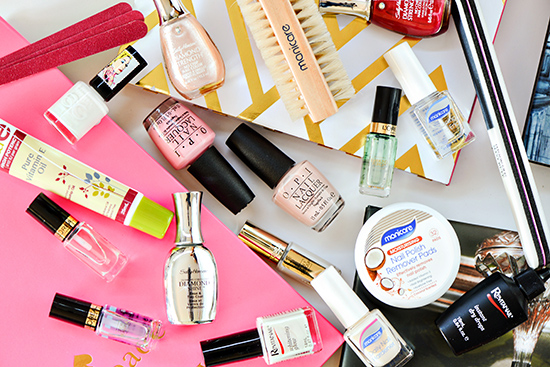
![]()
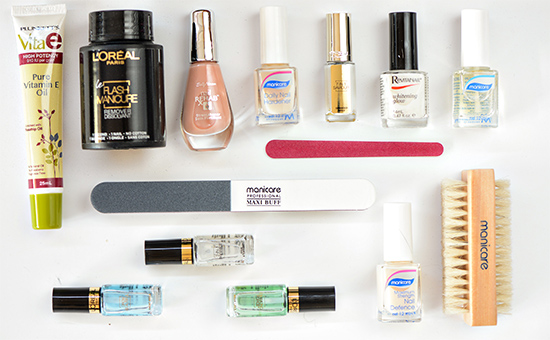
I learned the hard way that I can’t just dive into polishing my nails. I actually have to have a step by step process if I want it to last! So I kick off with a cuticle treatment applying a rich oil to massage and soften them (if my cuticles look particularly dry I do this every night before bed). I love Plunkett Pharmaceuticals VitaE Pure Vitamin E Oil which has a mix of natural vitamin E and rosehip oil (which really works for any body part, not just cuticles!) and then pushing back the cuticles gently with an orange stick.
If I need to remove any nail polish I actually do that first and I’m loving the ease of these new nail polish remover tubs like the L’Oreal Paris La Manicure Flash Remover. Instead of getting a cotton pad and soaking it, you literally pop your finger in the tub and the remover soaked sponge removes all polish traces! Following up with a nail brush (this Manicure Wooden Nail Brush does the trick) gets all the grit from underneath your nails and gives them a good clean. (Particularly good if you work a lot with your hands!)
For me, the next step is to buff and file. For filing I use a normal emery board (like these Manicare Emery Boards) to get the shape right (for me it’s a soft round shape) and smooth tips, and then I go in with a buffer (this one is Manicare Maxi-buff) . Half of one side is designed to buff away ridges and stains, the other half smooths out our nails when you buff back and forward and the full grey over-side is the final step – the shine buff! The first time I ever used one of these I was honestly a little gobsmacked at what a difference it made to my nails!
Then it’s onto strengthening and treatments. I pretty much ruined my nails the last time I did a nail polish review for Polka Dot Bride, so much taking off and putting on of polish! So I’m conscious of always trying to give my nails a strength boost. The Sally Hansen Nail Rehab gives a sheer pink colour to your nails while building up your nail strength with jasmine, rose and Vitamin E moisturising extracts. For this one you apply 1-2 coats alone or under your base coat. I actually love this one on it’s own, it’s your nails – but better!
L’Oreal Paris La Manicure Serum Miracle 7-in-1 can be applied before polish or as a daily treatment. It’s a serum packed with Argan Oil, Vitamin E and recovering agents to help your nails in seven ways: it is anti-break, anti-split, anti-chip, anti-ridges, anti-yellowing, stimulates nail growth and nourishes nails. If growth is your issue, try Loreal Paris La Manicure Grow Beautiful! It’s a clear base coat which main purpose is to give your nails the nourishment they need to grow strong.
Then it’s on to base coats – The Revitanail Whitening Glow acts almost as a foundation for your polish giving both the base coast protection and brightener. It helps smooth out any ridges and helps repair any brittleness. For something basic, the Manicare Base Coat plus Strengthener gives your nails protection from colour while helping to make your nails strong. This is also the L’Oreal Paris La Manicure Diamond Force selling point- a diamond strength formula while doing duty as a base coat. For something all in one, L’Oreal Paris La Manicure Base & Top Coat 2-in1 Protect acts as a base coast and a top coat for your manicure.
![]()
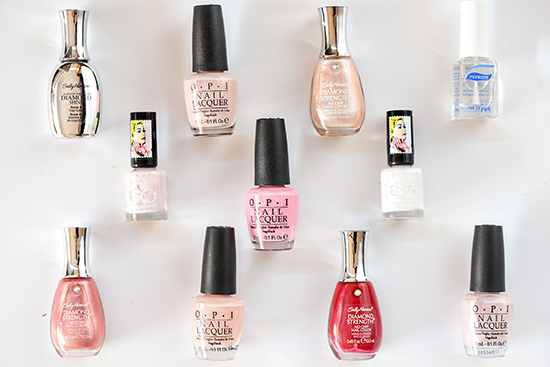
Choosing your polish colour is the fun part! So let’s get down to this colourful business! Don’t forget to start off with a base coat – I have so many to recommend, but the one I photographed is Manicare Base Coat Plus Strengthener because it gives your nails protection while also working to strengthen them.
I think a soft pale pink has to be the most popular option for brides. My favourite is OPI Bubble Bath or OPI Hopelessly In Love while Rimmel 60 Second Polish in Lose Your Lingerie gives you an opaque pale pink finish with a little shimmer. Sally Hansen Diamond Strength No-Chip Nail Colour Fairy Tale Ivory is a soft champagne pink shimmer. I love this for a bit of sparkle while still keeping to a natural tone. For a natural pink with a little pizazz OPI Altar Ego is a sheer pink with an opal finish that I love.
Steering away from more traditional nude pinks is Sally Hansen Diamond Strength No-Chip Nail Colour Blushing Bride – it’s deep peach shimmer polish that has almost a metallic effect when built up. OPI Pinking of You is one to try if you want a more blush, vivid pink colour without being too Barbie-esque and Rimmel 60 Second Polish White Hot Love is perfect for a modern opaque white.
I really do love colour on a bride’s nails and Sally Hansen Diamond Strength No-Chip Nail Colour Honeymoon Red is a brilliant cherry red that adds a sense of drama and romance (especially when paired with red lips). I also love deep burgundys, metallic gold and even warm peach tones.
Top it all off with Sally Hansen Diamond Shine Top Coat (which does double duty as a base coat). Claiming to give ten days of wear with diamond partials (sparkly!) it adds extra shine and protection to ensure your wedding manicure stays in place.
![]()
As much as I wish polish was the finishing touch, because I’m impatient, to make your manicure last and you feet and hands look nourished and like you haven’t just been tied to a glue gun for the past five weeks, there’s a few more steps to go!
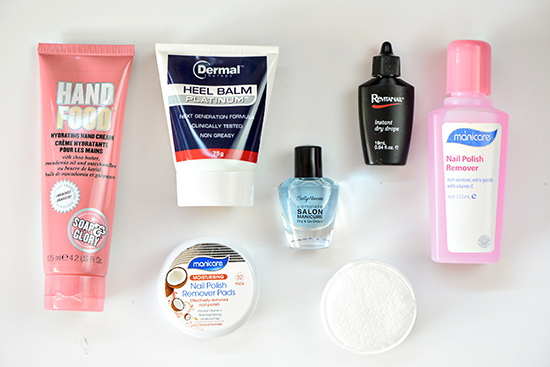
Investing in a decent hand cream is something I’ve only discovered the value of while my poor hands weathered winter. My absolute favourite is Soap & Glory Hand Food. I’m a big fan of this brand in general – I love the smell, it’s not greasy at all and it moisturises so darn well that I don’t have to re apply it five times a day. I’ve even gifted it to Mother Polka who is a hand cream lover and now it’s her staple too (big praise right there).
Not forgetting your feet, especially if you’re wearing open shoes or heading to the beach for your honeymoon is Dermal Therapy Heel Balm Platinum. If you have cracked heels this is a lifesaver but it’s also good for general moisturising. You apply this highly concentrated, highly emollient, non greasy balm once or twice daily to moisturise and protect your feet.
Now if you’re like me and somehow can’t actually wait the ten minutes it takes to get your nail polish to dry, quick dry drops are your friend! Sally Hansen Salon Manicure Dry & Go Drops are applied with a few drops 60 seconds after you apply your top coat which then dries your polish in under two minutes. It also contains nourishing oils of Vitamin E and jojoba formula for cuticle treatment. While Revitanail Instant Dry Drops allow you to add two drops to wet nails to protect them against bumps, nicks and smudges.
When it comes to taking it all off you can’t go past basic cotton pads (my favourite are the Swisspers Make Up Pads because they don’t disintegrate like tissues) and a basic remover (like Manicare Nail Polish Remover In Extra Gentle which is acetone free). However I love the Manicare Moisturising Nail Polish Remover Pads – especially if you’re taking an extended honeymoon because they’re a lot easier to travel with than a bottle of highly flammable liquid! The round plastic case holds 32 pads pre-soaked with remover.
What products do you love for at home manicures? What tips and tricks did I miss? Comment below!


Join the conversation