


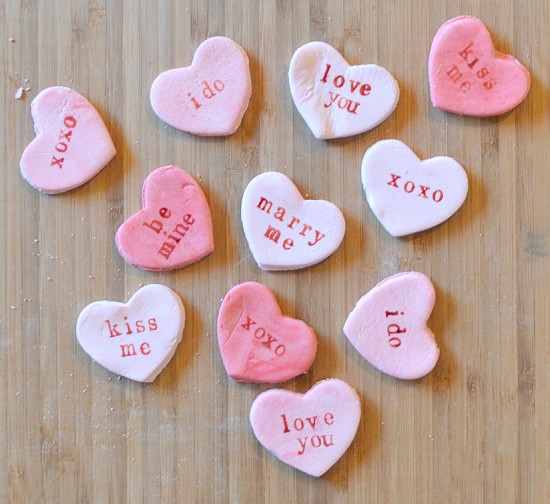
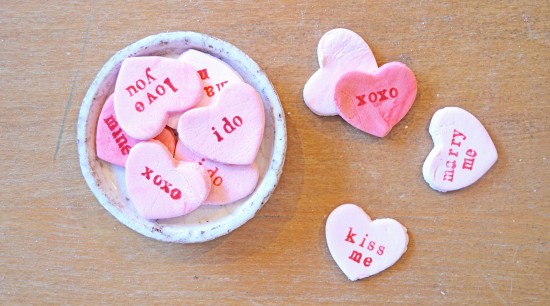
When I was a little girl, one of my favourite things to spend my pocket money on were conversation heart candies. With their quirky messages and crunchy sweetness, the candies were so much more than just a sweet snack – they were a barrel of fun for my giggling schoolmates and I. So if you’d like a tasty treat that will get your guests talking, try this grown up spin on a childhood favourite and create some candies of your own with this candy heart tutorial- complete with custom messages!
Ingredients
(Makes 40 candies)
- 3 cups soft icing sugar (and an extra cup for dusting your working board)
- 3/4 tsp powdered gelatine
- 1/4 cup lemonade
- Food colouring
- Flavour extracts of your choice
Things You’ll Need
- Small rubber alphabet stamps
- Clean paintbrush
- Small heart-shaped cookie cutter
Method
1. In a heat-safe bowl, dissolve the gelatine in the lemonade. Then, place the bowl over a pot of simmering water and stir until all gelatine granules have disappeared.
2. Using an electric mixer, add the icing sugar to your gelatine/lemonade mix; half a cup at a time. Mix until you have a slightly sticky dough with a texture similar to fondant icing.
3. Remove your dough and place it on a board dusted with icing sugar. Cover your hands with the sweet stuff as well – it’s going to get messy in a minute! Knead your dough until smooth and add more powdered sugar if you find it’s sticking to the board (or you!).
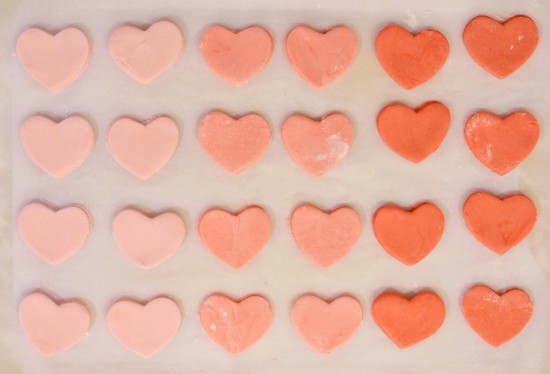
4. Divide your dough into portions, depending on how many colours and flavours you desire. I decided to go with an ombré of 3 shades of pink and chose vanilla, butterscotch and strawberry extracts – yum!
5. Make a well in the center of your first dough portion and pour in a few drops of your flavoured extracts and food colouring.
If you’d like an ombré effect, premix your food colouring to the darkest shade desired first, adding a small amount of colouring to the first batch and increasing the amount of colour for each dough portion. Some extracts may contain a bit of colouring themselves, so I suggest using the darkest coloured extracts for the dough that will be the darkest shade in the batch.
6. Knead in the colours and flavours, folding the dough into itself until you have an even colour. Taste your dough as you go and add more flavoured extract if needed.
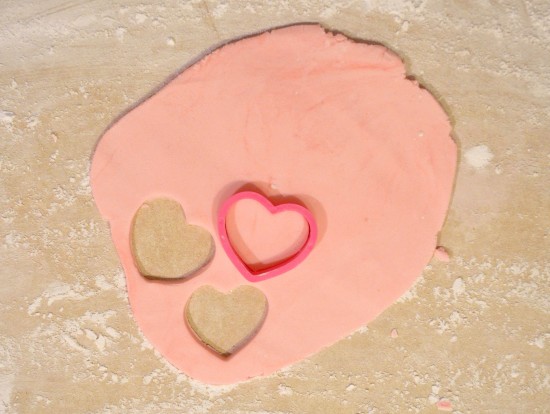
7. Once your dough is ready, dust a rolling pin with icing sugar and roll your dough to about 5mm thick. Then, cut out the hearts with your cookie cutter. Make sure you’ve chosen a cutter that will give you hearts large enough to stamp your messages on! Repeat the last three steps for all dough portions.
8. Lay your freshly cut candies on a tray lined with baking paper and leave them to dry for 48 hours. Flip them over every now and then to ensure they dry evenly.
9. Now for the fun part! Using your paint brush, spread a thin layer of food colouring onto a plate.
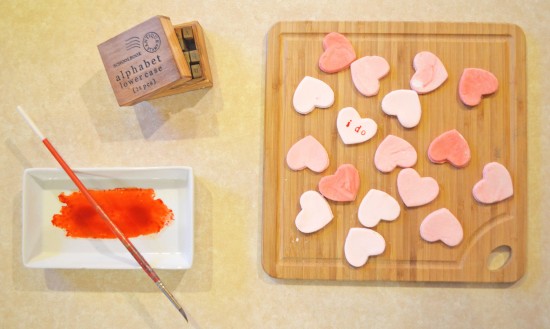
Press your stamps into the colouring and check them to ensure the colour is only sitting on the letter. I like to work with a clean damp cloth next to me, so I can wipe away any colouring that has spread to the background of the stamp (as this will create messy letters!) Then, stamp away to your heart’s desire!
![]()


Thanks! I’m going to make these in purple and green for my wedding and stamp them with our names and the date
Awesome! Its really amazing post, I have got much clear idea on the
topic of from this piece of writing.
Feel free to visit my blog post … leaflet print and delivery